What the Hell is a Pipeline?
Mostly I’ve been taking things fairly chill this week on my personal projects - however what I have been spending a lot of time working on is my build pipelines. Off of this, I thought it’d be interesting to do a really basic, practical guide on exactly what a pipeline is, and what their value is. For the entirety of this post, I’ll be talking about Azure DevOps pipelines specifically - but other options are available!
So… What’s a Pipeline?
In the technical sense, a pipeline is when you have a sequence of tasks that will be run in order, usually to create a build of your software. What’s important to remember though is that the tasks in question aren’t limited to just build actions. I found it helps to try and picture your pipeline as a sequence of scripts that will be run on an agent. In the case of Azure DevOps this agent is provided to you, to run your scripts. However, the agent is blank when your scripts start, and will be cleaned off after the run. So you either need to publish an artifact, or have one of your tasks deploy your code where it needs to go.
Too much jargon, so let’s bust some of it.
- Build: The compiled output of your source code, that can be run on other machines.
- Agent: A computer somewhere that you run your build pipeline on. You can either host this yourself, or use a provided one from Microsoft.
- Artifact: Usually the compiled code/output of a build. Technically you could publish any files as an artifact from the pipeline.
- Publish: Making the compiled output of the build available to download.
In really basic terms, you’re telling another computer, starting from the same blank state each time, to run a series of actions that will produce working software.
But What’s the Point?
Before I started playing with these in my own projects, this was my mindset. We used them at work for sure, but it wasn’t my job to make sure they worked. I kind of assumed they were only worth bothering with for big, important projects and I’d only need to care about them when one fell over. This I think is true perhaps, when you’re only looking at the CI side of CI/CD…
Wait hold on what the hell is CI/CD?
Continuous Integration / Continuous Deployment.
- Continuous Integration: Performing a build every time you change the project’s code. Or more accurately, whenever you change the code that is stored in source control for a project.
- Continuous Deployment: Deploying the latest code automatically to an environment (ie. website) - usually a test environment so you can check it works, although you can send it wherever you want.
Carry on…
What I’ve found however, is that having a pipeline setup for personal projects means that even on a very basic level, I’m keeping my focus on producing working software. There is no point in committing my code if the code doesn’t actually build. Even more important than this though, is that the pipeline takes care of pushing my code to “Production”. I get that instant satisfaction (well, okay, the pipeline takes ~10 minutes to complete) of my code being up and available.
So How Do I Do It?
There are two ways of creating a build pipeline in Azure DevOps. The first is with the interface itself - I don’t recommend this personally. It’s a bit clunky, and we’re developers after all. The second, and the way I’ve been totally converted to, is adding a yaml file to your source code, that defines the steps in your pipeline. As well as meaning your pipeline is documented in your source code, it also means that if you need to change the steps because of a change in the project (say, you added an extra application, or changed framework), you can do it at the same time you update the code.
Below is a really simple example of a yaml pipeline. I’ve commented each part of it, explaining what it does:
# This defines what branches being updated will cause the pipeline to be run
# This means you could have a branch called "wip_stuff_to_push_to_remote" and it wouldn't run the pipeline
trigger:
- master

# This is saying where to get the agent (computer) from, and what VM Image (base state) it should be in
pool:
  vmImage: 'ubuntu-latest'

# This is where we define the sequential steps of the pipeline
steps:

# This tells the agent to get all the necessary prerequisites to use dotnet core
- task: UseDotNet@2
  inputs:
    version: '3.1.x'
    packageType: sdk

# This tells the agent to run the dotnet command 'build' in the root directory
- task: DotNetCoreCLI@2
  inputs:
    command: 'build'
  displayName: 'Build the API'

# This tells the agent to run the dotnet command 'publish' in the root directory
- task: DotNetCoreCLI@2
  inputs:
    command: 'publish'
    publishWebProjects: True
    # The $(thing) syntax denotes a variable that will be replaced
    arguments: '--no-build --output $(Build.ArtifactStagingDirectory)'
    zipAfterPublish: True
  displayName: 'Publish the API'

# This, finally, tells the pipeline to publish a given artifact.
- task: PublishBuildArtifacts@1
  inputs:
    # Note that we are giving the same path we specified in the --output argument above
    pathtoPublish: '$(Build.ArtifactStagingDirectory)'
    artifactName: dotnet-api
I’m really scratching the surface with what these tasks are and what you can do with them. Ultimately, the documentation is excellent and extensive. You can also enable other tasks that have been created by the community within your project/organisation.
For example, you can checkout the build pipeline on my FitDash project, which I’ve recently made the move to being open source after a bit of a cleanup operation (gotta love throwing sensitive data into a repository). This pipeline does several things:
- Makes use of a variable group based on an Azure keyvault, meaning my sensitive data stays locked away
- Uses the great Replace Tokens task to replace… well tokens, with sensitive values.
- Builds both the dotnet API and the Angular frontend
- Deploys both of these finished bits of software to Azure
And even this is just scratching the surface. With the ability to include scripts of all the flavours of the rainbow (powershell, bash, python, shell etc), you can basically make the pipeline do whatever bizzare things your project might need to run. Which touches on the other great advantage - once your pipeline is setup, it serves as a working document of what is required to build your application. If you need to get yourself setup on a new machine or bring in a new developer, it usually provides a way of seeing exactly what a project contains.
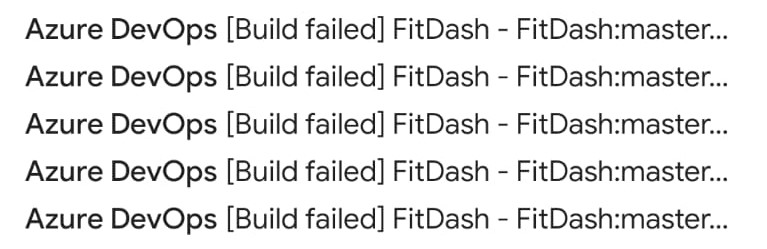
But What If I Break Something?
Break it! I get so many “failed build” emails whenever I’m messing around with this stuff, and ultimately that is okay. Because it’s meant that I’ve learned more, quickly, about what I can do with the damn thing. It also encourages getting away from the old adage of “works on my machine” - if you can get your application built on a clean box that you don’t own, it means you’ve got a handle on exactly what the application contains. No weird floating dlls or python path mysteries. Everything the application is or needs lives in the repository, for everyone to see and potentially judge for eternity.